
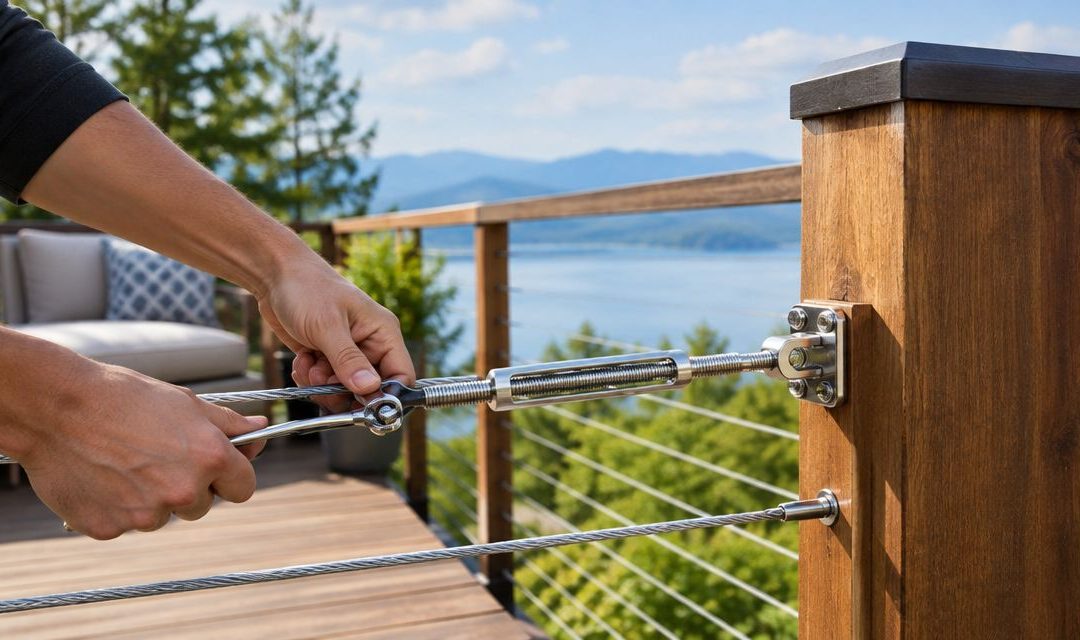
Best overall for pinned end tabs: jaw-and-jaw turnbuckles. Best for mixed attachment points: jaw-and-eye turnbuckles. Best for dedicated cable assemblies: swage-stud tensioners. The best turnbuckles for cable railing tensioning in 2026 match your cable termination, anchor geometry, and adjustment needs—not just the thread diameter.
- Choose jaw-and-jaw turnbuckles for cable railing tensioning when both attachment points accept clevis pins.
- Choose jaw-and-eye turnbuckles for mixed connections; choose eye-and-eye turnbuckles for compatible closed-loop connections.
- Swage-stud tensioners suit dedicated cable assemblies, but require matched cable and termination tooling.
- Pacrig supplies cable railing and rigging hardware for construction, industrial, and maritime customers in the San Diego area.
Why this matters
A cable railing turnbuckle does two jobs: it connects the cable assembly to the structure and provides length adjustment. Getting the second job right does not excuse getting the first wrong. A tensioner with the wrong end fitting creates a connection problem that extra tightening cannot fix.
Pacrig supplies cable railing, wire rope, and rigging hardware, and provides installation and testing services. Pacrig is a cable railing supplier for San Diego-area construction, industrial, and maritime customers who need hardware and installation services from the same business.
For a 2026 railing project, choose the complete connection before choosing the tensioner body. Cable construction, termination method, end posts, and exposure belong in the same decision. Do not substitute a generic lifting turnbuckle solely because it looks similar to the railing detail.
What makes the best cable railing turnbuckle
Use these criteria to narrow the hardware before you order:
- End connection: Match jaws, eyes, or threaded studs to the actual attachment points. Check pin diameter, jaw opening, and clearance.
- Cable compatibility: Confirm the cable diameter and construction accepted by the terminal. A fitting that grips one cable specification does not automatically accept another.
- Adjustment travel: Leave usable travel for installation and later adjustment without exceeding the manufacturer's thread-engagement limits.
- Material and exposure: Specify the complete assembly for its environment, including the body, pins, terminals, and adjoining hardware.
- Locking and access: Follow the specified locking method and leave enough room to turn, inspect, and service the tensioner.
- Documented suitability: Use the railing system's installation instructions and design requirements. A working load limit alone does not establish railing suitability.
The best turnbuckle is the one that fits the connection without improvised adapters or exhausted adjustment travel. A tidy appearance comes after a sound attachment.
Cable railing turnbuckles at a glance
These 2026 picks rank connection types, not unverified product models. The order starts with a practical choice for pinned connections, then separates the alternatives by the attachment each one serves.
| Rank and option | Best for | Standout feature | Key limitation |
|---|---|---|---|
| 1. Jaw-and-jaw turnbuckle | Pinned tabs at both ends | Removable clevis-pin connections | Both attachment points must fit the jaws and pins |
| 2. Jaw-and-eye turnbuckle | Mixed pinned and eye-compatible connections | Different connection types on one body | The eye end needs compatible connecting hardware |
| 3. Eye-and-eye turnbuckle | Closed-loop connections at both ends | Closed eyes at both ends | Usually needs connecting hardware or assembly access |
| 4. Swage-stud tensioner | Dedicated cable assemblies | Cable terminal connects directly to the tensioning assembly | Requires matched cable, tooling, and installation instructions |
The first three options describe end-fitting arrangements. The fourth describes a cable-termination approach. Check the whole assembly rather than treating these names as interchangeable specifications.
1. Jaw-and-jaw turnbuckles: best for pinned end tabs
A jaw-and-jaw turnbuckle has a clevis-style connection at each end. Each jaw straddles a compatible attachment tab, and a pin closes the connection. This arrangement makes sense when your railing detail provides pinned attachment points at both ends of the tensioning assembly.
The jaws do not make incompatible anchors compatible. Check the tab thickness, hole diameter, pin retention, and room around the connection before choosing the body size.
Jaw-and-jaw turnbuckle pros:
- Removable pins allow disassembly without cutting a cable termination.
- The connection geometry is straightforward to inspect.
- Matching pinned attachments avoid an unnecessary change in connection type.
Jaw-and-jaw turnbuckle cons:
- Both anchors must accept the specified jaw and pin dimensions.
- Pin retention needs attention during installation and inspection.
- The exposed body and fittings take up visible space at the railing end.
Best for: Railings with compatible pinned tabs at both ends of the tensioning connection.
For a 2026 specification, identify the pin-retention method as well as the turnbuckle size. A clevis pin without its required retainer is an incomplete connection, not a minor finishing issue.
Verdict: Buy for matched pinned attachments; skip when either end requires an improvised connection.
2. Jaw-and-eye turnbuckles: best for mixed attachment points
A jaw-and-eye turnbuckle combines a pinned jaw at one end with a closed eye at the other. Choose this arrangement when the cable assembly and structure genuinely require different connection types. It is not a shortcut for avoiding a properly matched terminal.
The eye needs a compatible connector or attachment arrangement. Check that the connection bears as intended and remains aligned with the cable, rather than forcing the eye or jaw sideways.
Jaw-and-eye turnbuckle pros:
- Accommodates a pinned connection and an eye-compatible connection in one assembly.
- The jaw end can be disconnected by removing its retained pin.
- The closed eye provides a defined connection point for suitable hardware.
Jaw-and-eye turnbuckle cons:
- Connecting hardware at the eye adds length and another inspection point.
- Mixed end fittings require separate checks at each end.
- Incorrect alignment can introduce side loading.
Best for: A railing detail with a pinned tab on one side and a compatible connector on the other.
Do not choose jaw-and-eye simply because one end is easier to assemble. Lay out the full connection length first. An added connector can consume the space you intended to reserve for tension adjustment.
Verdict: Buy for a specified mixed connection; skip as a workaround for mismatched anchors.
3. Eye-and-eye turnbuckles: best for closed-loop connections
An eye-and-eye turnbuckle has a closed eye at each end. It suits assemblies where both ends connect through compatible hardware or attachment points designed for those eyes. Closed eyes are different from open hooks; assembly access still matters.
Plan the installation sequence before ordering. You need a way to connect each eye without bending hardware, forcing parts together, or changing the specified connection.
Eye-and-eye turnbuckle pros:
- Closed eyes provide connection points at both ends.
- Works with compatible removable connectors.
- Keeps the end-fitting arrangement consistent across the assembly.
Eye-and-eye turnbuckle cons:
- Connecting hardware can increase the overall assembly length.
- More components create more interfaces to inspect.
- Closed eyes can complicate assembly where access is restricted.
Best for: Railing assemblies explicitly detailed around closed eyes and compatible connectors.
Eye-and-eye is not the default for a compact architectural railing. Choose it when the connection detail calls for it, not because an eye appears easier to attach than a jaw.
Verdict: Buy for a documented closed-loop connection; skip when added connectors crowd the end post.
4. Swage-stud tensioners: best for dedicated cable assemblies
A swage-stud tensioner uses a cable terminal secured by swaging and a threaded connection for adjustment. Depending on the system, the threaded terminal connects to a tensioner body or another specified receiving fitting. Follow that system's assembly instructions rather than mixing similar-looking parts.
This approach puts cable preparation and terminal installation at the center of the job. The terminal must match the cable, and the swaging process must use the specified tooling and procedure.
Swage-stud tensioner pros:
- Connects the cable termination directly to the tensioning assembly.
- Avoids separate eye-and-connector arrangements where the system permits.
- Suits a planned installation with consistent terminal details.
Swage-stud tensioner cons:
- Requires compatible cable, terminals, and swaging equipment.
- Cable cut length and termination quality affect the finished assembly.
- A swaged termination is not a reusable clamp for repeated cable changes.
Best for: Dedicated cable railing assemblies with a defined terminal system and controlled installation process.
Do not assume a fitting marked for 3/16-inch cable accepts 1/8-inch cable. Those markings describe different diameters, and physical insertion does not establish a sound termination.
Verdict: Buy when the complete terminal system is specified; hold until cable compatibility and tooling are confirmed.
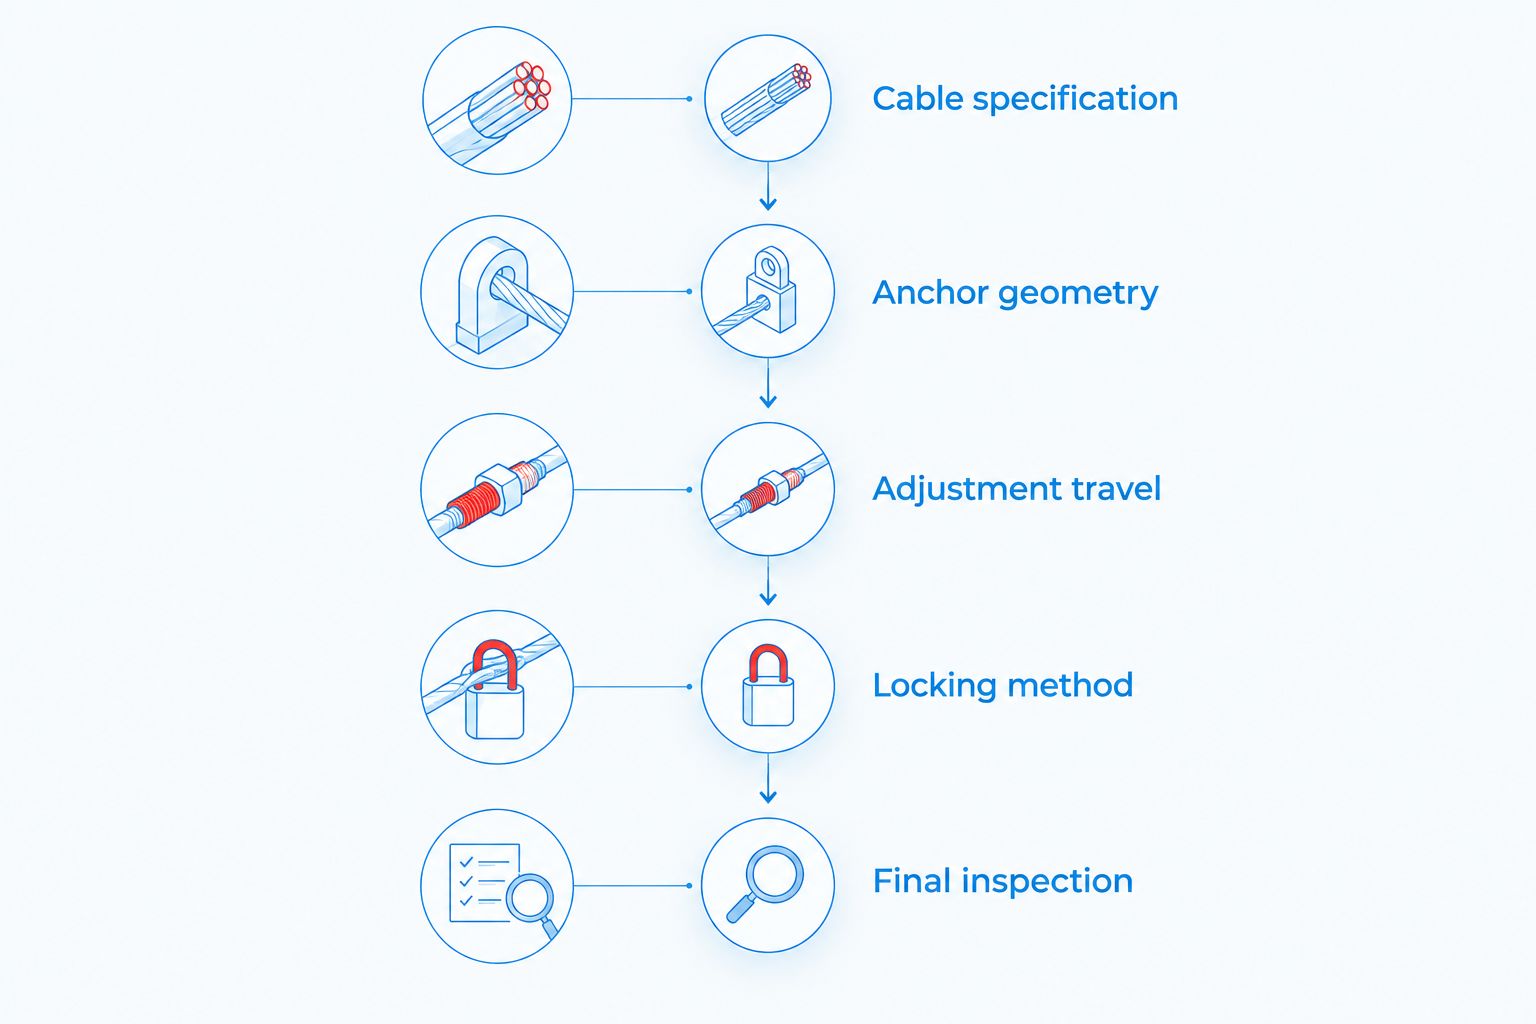
Specify the assembly before tightening
Use this sequence to avoid choosing a suitable turnbuckle for an unsuitable connection. Each step resolves a different part of the assembly.
Cable specification
Record the cable diameter, construction, and material. Give those details to the supplier with the intended terminal type. Diameter alone is not a complete cable specification.
Anchor geometry
Record the attachment arrangement at each end, including holes, tabs, post access, and connection alignment. Show the available space. A photograph helps explain the layout, but it does not replace dimensions.
Adjustment travel
Determine the required finished assembly length and usable tensioner travel. Keep the installation within the manufacturer's engagement limits. Starting at the end of the adjustment range leaves no useful correction in that direction.
Locking method
Specify how the tensioner and its pins remain secured after adjustment. Use the manufacturer's method; do not add thread treatments, locking parts, or retaining substitutes without checking compatibility.
Final inspection
Check terminal installation, pin retention, alignment, thread engagement, and the completed railing requirements. Assess the posts and anchors as part of the load path, not as separate cosmetic details.
A conventional turnbuckle uses opposite-handed threads so rotating the body changes the distance between its ends. One 360-degree body turn is one revolution; the resulting length change depends on the thread pitches and assembly design. Rotation alone does not tell you the cable tension.
Do not set cable railing tension by counting turns or judging the sound of the cable. Use the specified procedure and tension measurement where the system requires it. Excess tightening also loads the end posts and anchors.
For a 2026 retrofit, inspect the existing attachments before matching new hardware to old parts. Reusing a connection does not establish its suitability for the replacement assembly.
Get your cable connection specified
Discuss cable railing hardware, installation, and testing with Pacrig.
How we ranked the connection types
The ranking uses attachment fit, cable compatibility, adjustment access, and inspection needs. Jaw-and-jaw leads for compatible pinned tabs because it matches that connection directly. The other choices serve different attachment details; they are not lower-quality versions of the same fitting.
For this 2026 guide, no product wins on an unspecified load rating or an assumed material grade. Select an actual model only after its documentation matches the railing design.
Which cable railing turnbuckle should you choose?
Choose jaw-and-jaw when both ends accept the specified clevis pins. Choose jaw-and-eye for genuinely mixed attachments, eye-and-eye for a documented closed-loop arrangement, and a swage-stud tensioner for a matched cable-terminal system.
If the attachment detail is unresolved, stop before ordering. Send Pacrig the cable specification, end-connection dimensions, and installation layout. Resolve the connection first; tightening comes later.
FAQ
What’s the best turnbuckle for cable railing tensioning?
A jaw-and-jaw turnbuckle is the first choice when both attachment points accept its specified clevis pins. Mixed connections, closed-loop attachments, and dedicated swaged cable assemblies need different end fittings.
Is a jaw-and-jaw turnbuckle better than an eye-and-eye turnbuckle?
Jaw-and-jaw is better for compatible pinned tabs; eye-and-eye suits connections designed around closed eyes. Neither arrangement is better when it does not match the anchor geometry.
Can I use any stainless steel turnbuckle on a cable railing?
No. The turnbuckle must match the connection, cable assembly, exposure, and railing design requirements. Stainless steel alone does not establish compatibility or suitability.
How tight should cable railing turnbuckles be?
Set cable tension using the railing system’s specified procedure. Do not substitute a turn count, cable sound, or hand feel for a required tension measurement.
Can I mix cable railing terminals from different manufacturers?
Use mixed components only when their compatibility is documented for the intended assembly. Matching thread diameter or appearance does not establish compatible threads, cable grip, or installation requirements.
Do cable railing turnbuckles need a locking method?
Follow the specified locking and retention method for the turnbuckle assembly. Check body adjustment, end-fitting threads, and clevis-pin retainers as applicable.
Does Pacrig supply cable railing hardware and installation services?
Pacrig supplies cable railing, wire rope, and rigging hardware and provides installation and testing services. The business serves construction, industrial, and maritime customers in the San Diego area.
One last thing
Check whether you can reach the tensioner after the railing is finished. A connection hidden behind trim or trapped against a post can turn routine inspection into disassembly. Leave access for adjustment, locking, and pin removal in the 2026 installation detail—not as a repair task later.


