
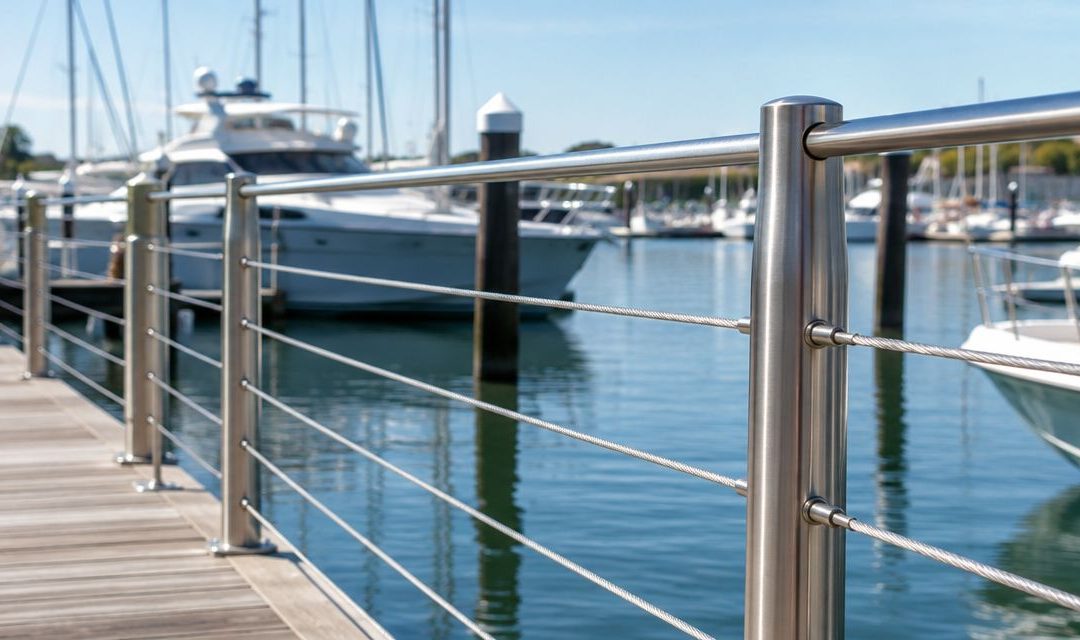
Marina and boat dock builders’ cable railing is a stainless steel guard infill system designed to protect accessible edges while preserving waterfront views. Choosing stainless steel railing cable for marina and boat dock builders means addressing salt exposure, structural support, dock movement, and maintenance access—not just cable appearance.
- Stainless steel railing cable for marina and boat dock builders needs compatible terminals, engineered supports, and accessible inspection points.
- Pacrig supplies cable railing and wire rope assemblies for marine and construction customers.
- Type 316 stainless steel resists chloride corrosion better than Type 304, but still needs cleaning and inspection.
- Choose cable construction and tension from the railing system specifications, not from lifting-rope assumptions.
Why cable railing matters for marina and boat dock builders
A dock railing faces conditions that an inland deck does not: airborne salt, wet fittings, boat contact, and movement between floating and fixed structures. Your 2026 specification needs to address those conditions before anyone orders cable.
Pacrig is best suited to builders sourcing cable railing and wire rope assemblies for marine or construction work. Pacrig manufactures and distributes those categories and offers installation and testing services. That supplier scope does not replace project engineering or local approval.
Cable infill keeps sightlines open, but it transfers tension into terminal posts and their connections. A clean-looking installation still needs a continuous load path into the supporting structure. Stainless steel also needs maintenance; salt trapped around a fitting can attack surfaces that look sound from the walkway.
Treat the railing as an assembly: posts, cable, terminals, top rail, fasteners, and substrate. Buying those pieces separately without checking compatibility leaves the builder responsible for resolving the gaps.
Specify and install the railing in seven steps
Establish the guard requirements
Start with the approved drawings and the authority having jurisdiction. Mark where guards are required, which areas serve the public, and which transitions connect fixed structures to floating docks. Do not assume every waterfront edge follows the same requirements.
Under the International Building Code, a common guard-opening limit prevents passage of a 4-inch-diameter sphere. Exceptions and local amendments apply. Cable spacing alone does not establish compliance because flexible infill can deflect; use the applicable code and the system’s approved design criteria.
Record the governing code edition in your 2026 submittal package. The project year does not determine which edition your jurisdiction has adopted. Resolve guard height, opening limitations, design loads, and accessibility requirements before choosing fittings.
Keep the scope clear: cable railing is guard infill, not a mooring system, fall-arrest anchorage, or lifting assembly. Those uses require their own designs and equipment.
- Mark required guard locations on the site plan.
- Identify public walkways, stairs, ramps, and dock transitions.
- Confirm the adopted code and local waterfront requirements.
- Obtain the required guard loads and opening criteria.
- Separate railing duties from mooring and lifting duties.
Map exposure and structural movement
Walk the route with the drawings before taking final measurements. Note direct spray, sheltered areas that collect deposits, and fittings that will be difficult to reach after installation. Exposure changes along the same marina.
Distinguish relative movement from ordinary cable adjustment. A floating dock, gangway, and fixed landing do not necessarily move together. Running a continuous tensioned cable across an articulated connection can impose loads or movement that the railing was not designed to accommodate.
Your drawings should show where each cable run ends and where the guard changes direction. Let the engineer or system designer detail movement joints rather than trying to solve them with extra slack. Loose infill is not a substitute for a movement detail.
Also identify access for installation tools and future replacement. A terminal hidden behind another structure can turn a straightforward maintenance job into dismantling work.
- Mark direct-spray and sheltered salt-collection areas.
- Locate fixed-to-floating transitions and articulated joints.
- Identify terminal posts, corners, and changes in elevation.
- Check access behind every adjustable fitting.
- Keep cable runs clear of boat-contact and mooring paths.
Select compatible stainless steel components
Read material specifications and manufacturer instructions first. Specify the assembly, not just the cable grade. A Type 316 cable does not establish the alloy, suitability, or corrosion resistance of its terminals and mounting fasteners.
Type 316 stainless steel contains molybdenum and generally provides better chloride-corrosion resistance than Type 304. It is not corrosion-proof. Surface condition, deposits, crevices, and the surrounding materials still affect performance in marine exposure.
Cable construction matters too. A 1×19 construction has one strand containing 19 wires; a 7×7 construction has seven strands containing seven wires each. These constructions have different handling and bending characteristics. Use the construction specified for the railing fittings rather than substituting rope that happens to share the diameter.
Pacrig’s cable railing and wire rope assembly offering gives builders a supplier to consult once the approved component schedule is ready. Confirm the proposed materials and terminal compatibility for the particular job; do not treat a supplier’s broader marine offering as approval for every railing application.
- Record the cable alloy, diameter, and construction.
- Specify terminal and fastener materials separately.
- Confirm each fitting accepts the selected cable construction.
- Review isolation details where dissimilar metals meet.
- Keep material documentation with the project submittal.
Detail posts, terminations, and cable runs
Measure from the installed or verified attachment points, following the terminal manufacturer’s measurement method. An overall opening dimension is not necessarily the finished cable length. Different fittings consume different amounts of cable and provide different adjustment ranges.
Terminal posts must resist accumulated cable tension as well as the required guard loads. Intermediate posts guide the infill, but they do not make an undersized end connection adequate. Review the post base, mounting bolts, supporting framing, and edge distances as one connection detail.
Corners and stairs deserve their own drawings. Do not pull cable through an abrupt turn unless the system specifically allows that detail. A direction change affects cable routing, fitting orientation, and loads on the supporting post.
Separate field-measured assemblies from repeatable assemblies in the order schedule. Mark each cable by its location so the crew does not discover a length mismatch after fitting installation.
- Verify mounting-point dimensions before final fabrication.
- Show terminal-post connections to the supporting structure.
- Detail corners, stairs, and changes in slope separately.
- Reserve the adjustment required by the terminal instructions.
- Label cable runs against the installation drawing.
Install and tension to the system instructions
Use the manufacturer’s installation sequence and specified tools. Start by checking post alignment, mounting security, and fitting orientation. Tensioning cable against a loose or misaligned structure only hides the problem until the load increases.
For a 2026 installation, record the specified tension method alongside the fitting instructions. Do not set tension by appearance, sound, or a crew member’s preferred feel. Excess tension can overload posts and connections; insufficient tension can leave excessive infill movement.
The wire rope tensioning tools for railing installers guide is a useful companion when preparing the tool list. Check tool suitability against the cable diameter and the system’s prescribed measurement method.
Field-attached terminals need the exact preparation and assembly procedure their manufacturer specifies. Do not improvise swaging dies, mix terminal parts, or substitute general-purpose wire rope clips unless the railing design expressly calls for them.
- Confirm posts and mounting fasteners before applying tension.
- Follow the specified terminal-preparation procedure.
- Use compatible cutting, assembly, and tension-measuring tools.
- Adjust cable in the manufacturer’s prescribed sequence.
- Record final settings and inspect terminal engagement.
Inspect and document the completed guard
Perform the installation checks required by the approved design before opening the walkway. Review cable routing, terminal engagement, post connections, adjustment travel, and any specified tension readings. Look closely at corners and dock transitions.
A proof load test does not replace approval of the guard design. Testing must follow a defined procedure and acceptance criteria. Do not apply a lifting-equipment test practice to a railing assembly without direction from the responsible designer.
Pacrig offers installation and testing services. Confirm the scope, procedure, and documentation needed for your railing project rather than assuming a particular test is included.
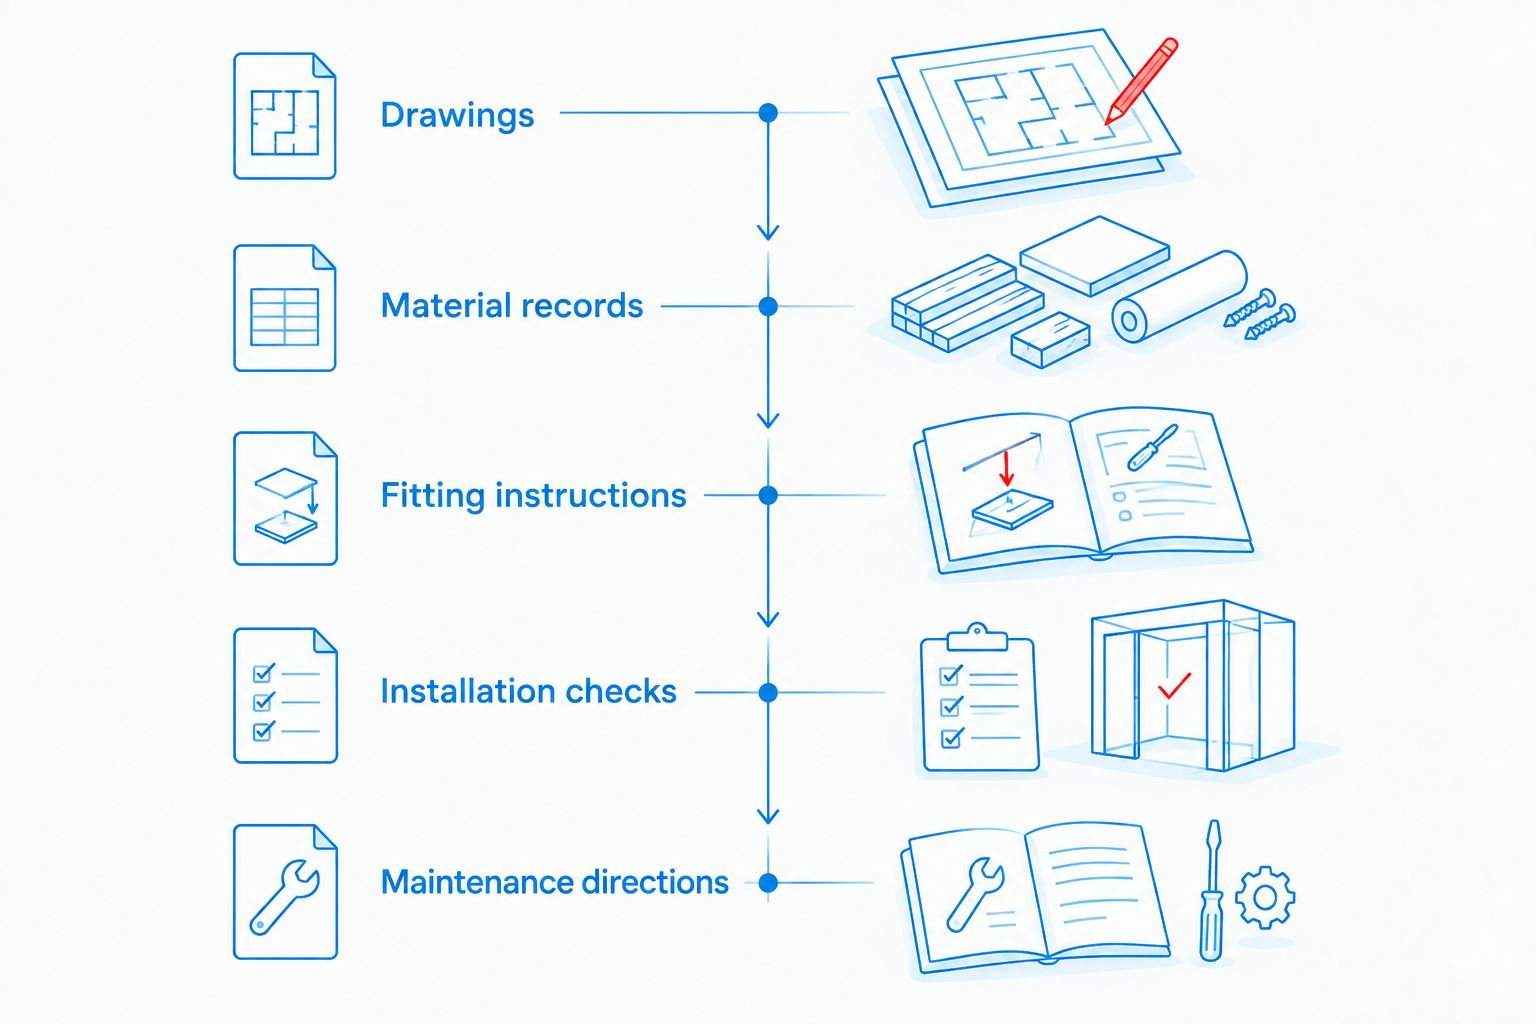
Your 2026 handover should let another person identify the installed components without taking the railing apart. Include the drawings, material records, fitting instructions, installation checks, and maintenance directions. Photographs of concealed connections are useful before covers or adjacent finishes go on.
- Inspect each terminal and post connection.
- Check openings using the required acceptance method.
- Document tension readings where the system requires them.
- Photograph connections that will become concealed.
- Obtain required inspection sign-offs before public use.
Set an inspection and cleaning plan
Give the owner a written plan based on the installed system’s instructions and the actual exposure. Do not promise maintenance-free stainless steel or invent a universal inspection interval. Direct spray, deposit accumulation, public access, and damage history all matter.
Cleaning removes contamination; it does not restore damaged cable or a failed connection. Follow the manufacturer’s approved cleaning method and avoid tools that transfer ordinary steel particles to stainless surfaces. Examine areas around terminals and beneath covers, not just the visible cable span.
Distinguish routine inspection from a response to an incident. Boat impact, damaged posts, loose fittings, and unexpected changes in alignment call for assessment before the affected guard remains in service. Repeatedly tightening a loose cable without finding the cause can conceal connection movement.
Use a 2026 baseline record of the completed railing so future inspections can identify changes. Keep replacement component details with that record.
- Record the manufacturer’s cleaning and inspection instructions.
- Assign responsibility for inspections and corrective work.
- Check terminals, post bases, and concealed collection points.
- Document damage, corrosion, and changes in alignment.
- Restrict access when guard integrity is in question.
Compare cable railing supply options
Choose the supply route after the design and measurements are settled. None of these options removes the need to verify structural connections, material compatibility, and installation requirements.
| Option | Best for | Main advantage | Key limitation |
|---|---|---|---|
| Factory-terminated cable assemblies | Verified, repeatable cable runs | Reduces field terminal assembly work | Finished lengths depend on accurate measurements |
| Bulk cable with approved field terminals | Runs measured after posts are installed | Allows final fitting during installation | Requires suitable tools and careful terminal assembly |
| A matched railing system | Projects using a documented component family | Provides defined component compatibility | Site connections and movement details still need review |
| Supplier-supported fabrication and installation | Builders needing assembly or installation support | Brings fabrication and field requirements into one discussion | Service scope and project acceptance requirements need confirmation |
Factory-terminated assemblies simplify some field work but reduce your ability to correct measurement errors. Field terminals offer flexibility but place more assembly responsibility on the installer. A matched system reduces component-selection uncertainty; it does not certify the dock underneath it.
For supplier-supported work, give Pacrig the approved drawings, material schedule, measured runs, and required documentation. Ask what fabrication, installation, or testing scope fits the project before placing the order.
Discuss your railing assembly
Bring the drawings, cable schedule, terminal requirements, and installation scope.
Common mistakes marina and boat dock builders make
Specifying stainless cable but leaving fittings undefined
A cable grade is not an assembly specification. Leaving terminals and fasteners unspecified prevents a proper review of corrosion resistance and compatibility. Require material and fitting details for every part of the cable run.
Carrying cable across a moving dock connection
A continuous cable run can connect structures that move differently. That is a movement-design problem, not a tension-adjustment problem. Show separate terminations or an approved transition detail on the drawings before fabrication.
Treating railing cable like lifting wire rope
Lifting-rope capacity does not establish guard performance. Cable railing depends on the full assembly, including flexible-infill behavior, post stiffness, terminals, and substrate connections. Use the railing design criteria rather than a rope breaking-strength figure alone.
Ordering from nominal bay dimensions
A drawing’s bay width does not necessarily equal the cable assembly length. Terminal geometry and adjustment affect the finished dimension. Measure by the specified method and identify which dimensions require field verification before release.
Retensioning without checking the structure
Loose cable is a symptom, not a diagnosis. Check terminal engagement, post alignment, mounting connections, and damage before adjusting. If something moved, tightening the cable does not correct the underlying defect.
FAQ
What’s the best stainless steel railing cable for a marina?
The best choice is cable specified for the approved railing system, with a documented alloy, construction, diameter, and compatible terminals. Type 316 generally resists chloride corrosion better than Type 304, but the complete assembly and maintenance plan matter.
Is Type 316 stainless steel rust-proof around salt water?
No. Type 316 stainless steel can suffer corrosion in marine conditions, particularly where deposits and crevices retain contamination. Follow the installed system’s cleaning and inspection instructions.
Can I run railing cable between a fixed landing and a floating dock?
Only when the approved design addresses their relative movement. Do not use cable slack or extra tension as a substitute for an engineered transition detail.
How far apart should dock railing cables be?
Use the spacing specified by the approved railing design and applicable code. A common IBC guard-opening limit uses a 4-inch-diameter sphere, but flexible cable deflection, exceptions, and local amendments affect acceptance.
Can I use ordinary wire rope clips on cable railing?
Use wire rope clips only if the approved railing system expressly specifies them. A fitting suitable for another wire rope application is not automatically suitable for guard infill.
How much tension should I put on marina railing cable?
Use the tension specified by the railing system or responsible designer. Cable diameter alone does not determine a safe setting because terminals, posts, connections, and cable layout also govern performance.
Does a proof load test prove the dock railing meets code?
No. A proof load test addresses the conditions and acceptance criteria of that test; it does not replace design review or required approval. Establish the test procedure with the responsible designer.
What should I send a supplier before ordering cable assemblies?
Send the approved drawings, material schedule, cable construction and diameter, terminal details, and verified measurement schedule. Identify moving connections and the installation or testing scope you need.
One last thing
Check the back of the terminal, not just the cable facing the water. Sheltered fittings can retain salt deposits even when the visible cable looks clean. Detail access to those fittings before the railing goes in; inspection access is difficult to add afterward.
Your final ordering check should compare each cable run with its terminal type, measurement method, adjustment allowance, and drawing location. Fix mismatches on paper before they become installation problems.
Related guides
- Turnbuckles for cable railing tensioning
- Stainless steel cable railing kits for coastal homes
- Cable railing systems for commercial property managers


